


Key Takeaways
- Read differential pressure (DP) with airflow and with residual DP after cleaning. One DP number cannot separate blinding, overloading, and torn bags.
- A sudden DP drop with visible stack emissions usually means torn bags or failed seals. Find the leak path before ordering new bags.
- Weak suction can start in the ducts, dampers, or fan as easily as in the filters. Check hood static pressure first.
- Low header pressure, wet or oily pulse air, leaking diaphragms, and misaligned blowpipes raise DP and shorten bag life, often without an alarm.
- Keep gas above the dew point of every condensable, acids included, especially during start-up, shutdown, and low-load running.
- Record where each failed bag sat and how it failed. The pattern separates abrasion, cage, thermal, chemical, and installation causes.
- A choked hopper or worn rotary airlock sends dust back onto the bags, raises DP, and wears through bag bottoms.
- Trend residual DP and fan current on the same chart. Together they separate many filter faults from airflow faults.
How To Troubleshoot An Industrial Dust Collector
Industrial dust collector troubleshooting means tracing a symptom back to the part of the system that caused it. The symptom may be rising differential pressure, weak suction at a hood, or dust at the stack. The cause almost always sits in one of five places: the hoods and ducts, the filter media, the cleaning system, the hopper and discharge, or the fan.
Most faults creep in slowly. DP climbs over a few weeks, the hood at the far end of the line stops holding dust, the compressor loads more often, or a faint puff shows at the stack after each pulse. By the time production complains, the usual reactions (new bags, a faster fan, more frequent pulsing) tend to treat the symptom and leave the cause in place.
Differential pressure (DP) is the pressure difference between the dirty-air and clean-air sides of the filters. It is usually read in mm WC, in. H2O, or Pa, and it is the first number most operators look at.
Start with four readings and compare each with the commissioning baseline or the OEM's operating range:
- DP across the filters, as a trend, including the residual value just after cleaning.
- Airflow or its proxies: fan current and speed, and hood static pressure at the critical pickup points.
- Cleaning system condition: header pressure and pulse sequence on pulse-jet units, or damper and reverse air fan operation on reverse air units.
- Outlet emissions: stack opacity, a bag leak detector signal, or dust trails in the clean-air plenum.
Then read them together. DP depends on both filter resistance and gas velocity, as EPA's Air Pollution Control Cost Manual explains, so a DP reading on its own can mislead. High DP with falling airflow points to the filters or cleaning. Low DP with dust at the stack points to a leak. Low DP with weak suction everywhere points to the fan.
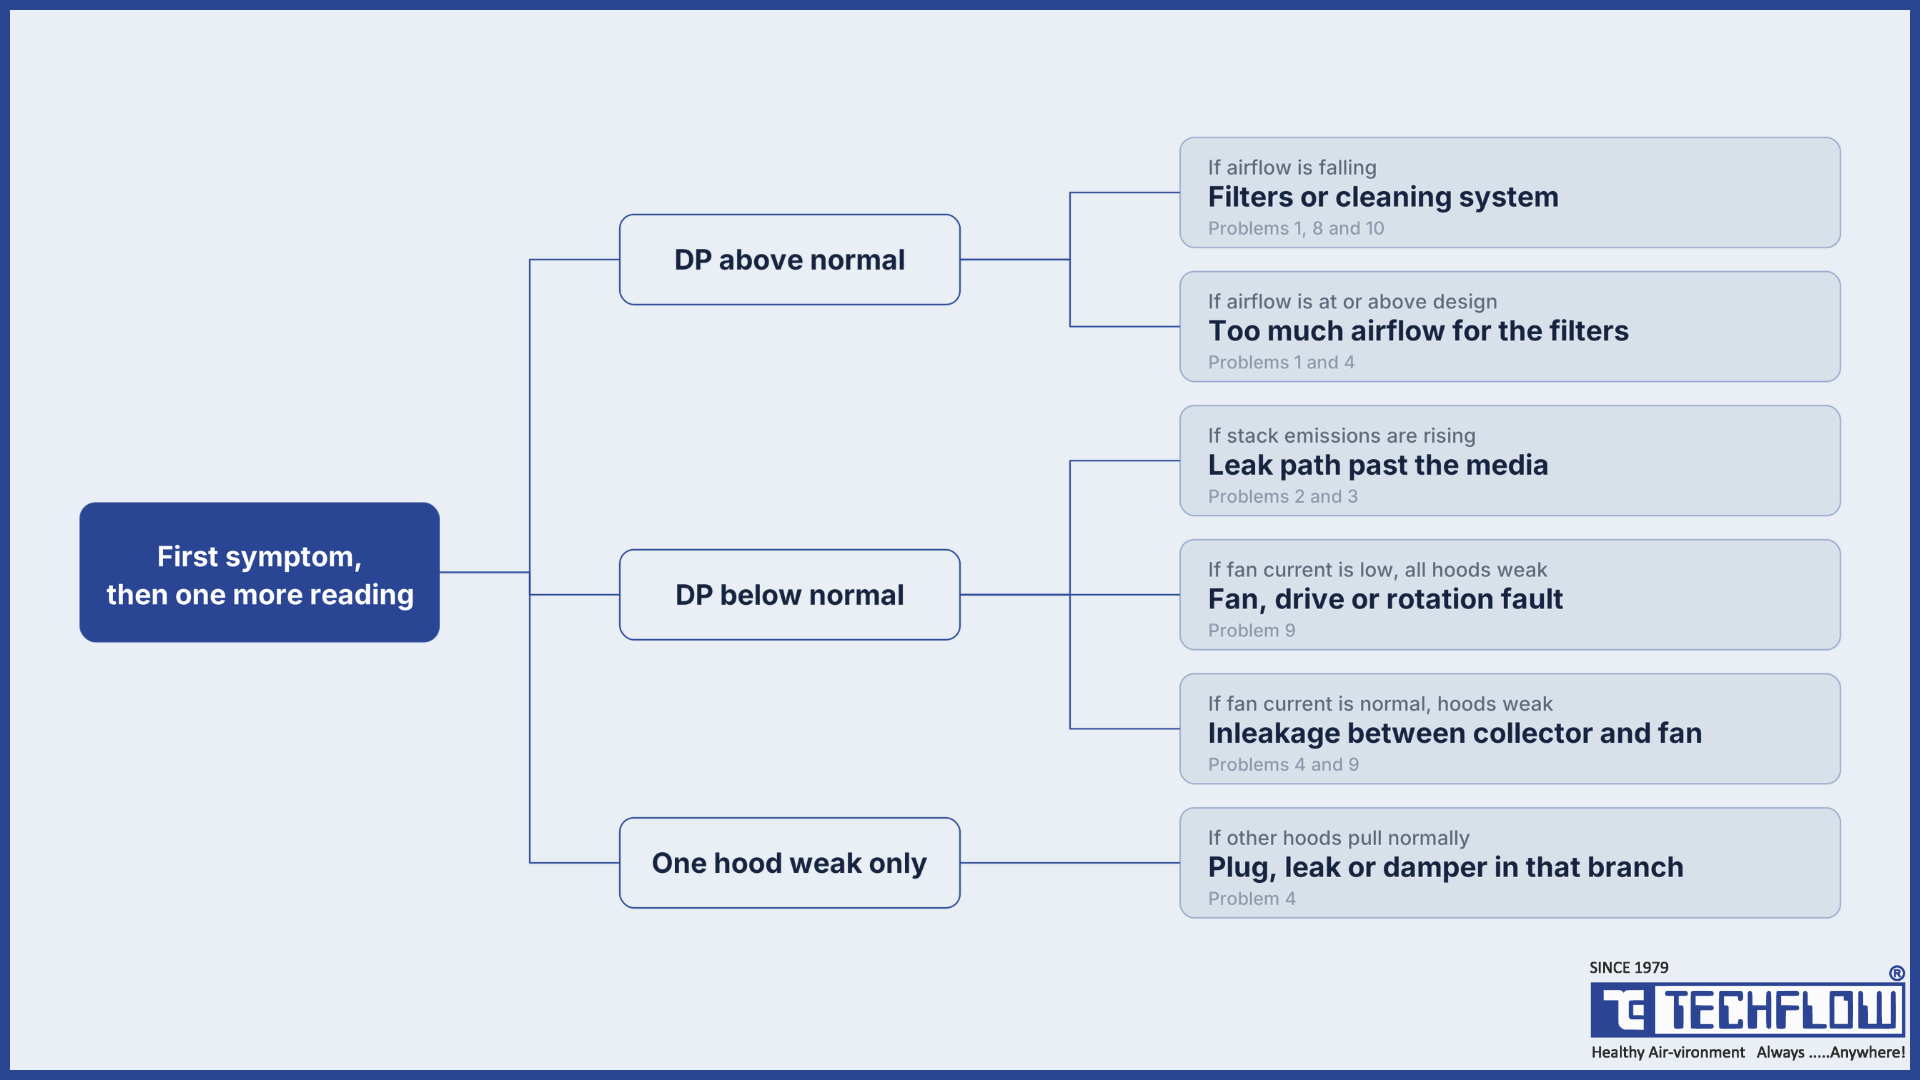
Follow the first symptom, then the second reading, to the section of this guide that covers the likely cause.
If you can set up only one trend, plot residual DP and fan current on the same chart. Residual DP rising while fan current falls usually means the filters are restricting flow. DP and fan current falling together usually means the fan or its drive is delivering less air.
This guide covers fabric filters: pulse-jet bag filters, pleated cartridge and envelope collectors, and reverse air units. Cyclones, multiclones and electrostatic precipitators work on different principles, although the duct, fan and hopper sections still apply to them. For an overview of equipment types, see TECHFLOW's range of dust collection systems and air pollution control equipment. Treat what follows as general engineering guidance. Your OEM manual, design data, and site safety procedures take priority for setpoints, pressures, intervals, and entry procedures.
Dust Collector Troubleshooting Table: Symptom, Cause, Check And First Fix
Find your symptom in the first column, run the check, then make the first fix. The causes listed are the likely ones, so confirm them before you order parts or book a shutdown.
| Symptom | Probable causes | Check | First corrective action | Problem no. |
|---|---|---|---|---|
| DP rising steadily, airflow falling | Media blinding, weak cleaning, finer or heavier dust, moisture | Residual DP after cleaning, header pressure, valve audit, gas temperature against dew point | Restore cleaning energy first; replace media only if residual DP stays high | 1, 8, 10 |
| DP high, airflow at or above design | Airflow added beyond design, dampers opened, higher dust load | Flow measurement, gas-to-cloth recalculation, change log | Restore damper settings and rebalance; get an OEM review before adding capacity | 1, 4 |
| DP drops suddenly, emissions rise | Torn or detached bags, unseated snap bands, tubesheet crack, open bypass | Clean-air plenum inspection, leak detector trend, dye test | Replace or reseat failed elements, then find out why they failed | 2, 3 |
| DP low, suction weak at every hood | Fan delivering less flow: belt slip, low speed, reverse rotation, wheel build-up | Fan speed, rotation and current against baseline | Correct the drive or rotation; clean and balance the wheel | 9 |
| Suction weak at one hood only | Plugged branch, closed damper, duct leak | Hood static pressure against baseline, damper position, tap test | Clear the duct, reset the damper, seal leaks, rebalance | 4 |
| Dust puff at the stack after each pulse | Damaged bags or poor seals in the row being pulsed; cake loss on worn media | Match emission spikes to the pulse sequence, then inspect that row | Replace that row's failed elements; review cleaning intensity | 2, 7 |
| Compressor loads constantly, header pressure sags | Leaks, stuck-open diaphragm valve, over-cleaning, undersized supply | Static header decay test, ultrasonic survey, valve-by-valve check | Repair leaks and valves; move to DP-based cleaning | 5, 8 |
| Hopper full, dust packed at bag bottoms | Discharge stopped, bridging, damp dust, airlock inleakage, ash conveying fault | Level probe test, airlock speed and current, material at the outlet | Restore discharge, clear the hopper safely, repair airlock clearance | 6 |
| Bags caked with mud-like deposits | Condensation, wet pulse air, hygroscopic dust, process water | Inlet and outlet temperature against dew point, header drain, dryer | Restore temperature margin and air dryness, then replace blinded bags | 10 |
| Repeated bag failures in one area | Inlet abrasion, misaligned blowpipe, defective cages, bag rubbing, hot spots | Failure map, lab analysis of failed bags, cage and blowpipe checks | Fix the mechanism the damage pattern reveals before rebagging | 3 |
| Fan vibration rising | Wheel build-up or erosion, bearing wear, belt or alignment faults | Vibration and bearing temperature trend, wheel inspection | Clean, balance or repair; dust on a clean-side fan means checking the filters too | 9 |
| White plume that fades within a short distance | Condensed water vapour rather than dust | Opacity and leak detector readings, gas moisture | No filter work needed if the readings are normal | 2, 10 |
10 Common Dust Collector Problems And How To Fix Them
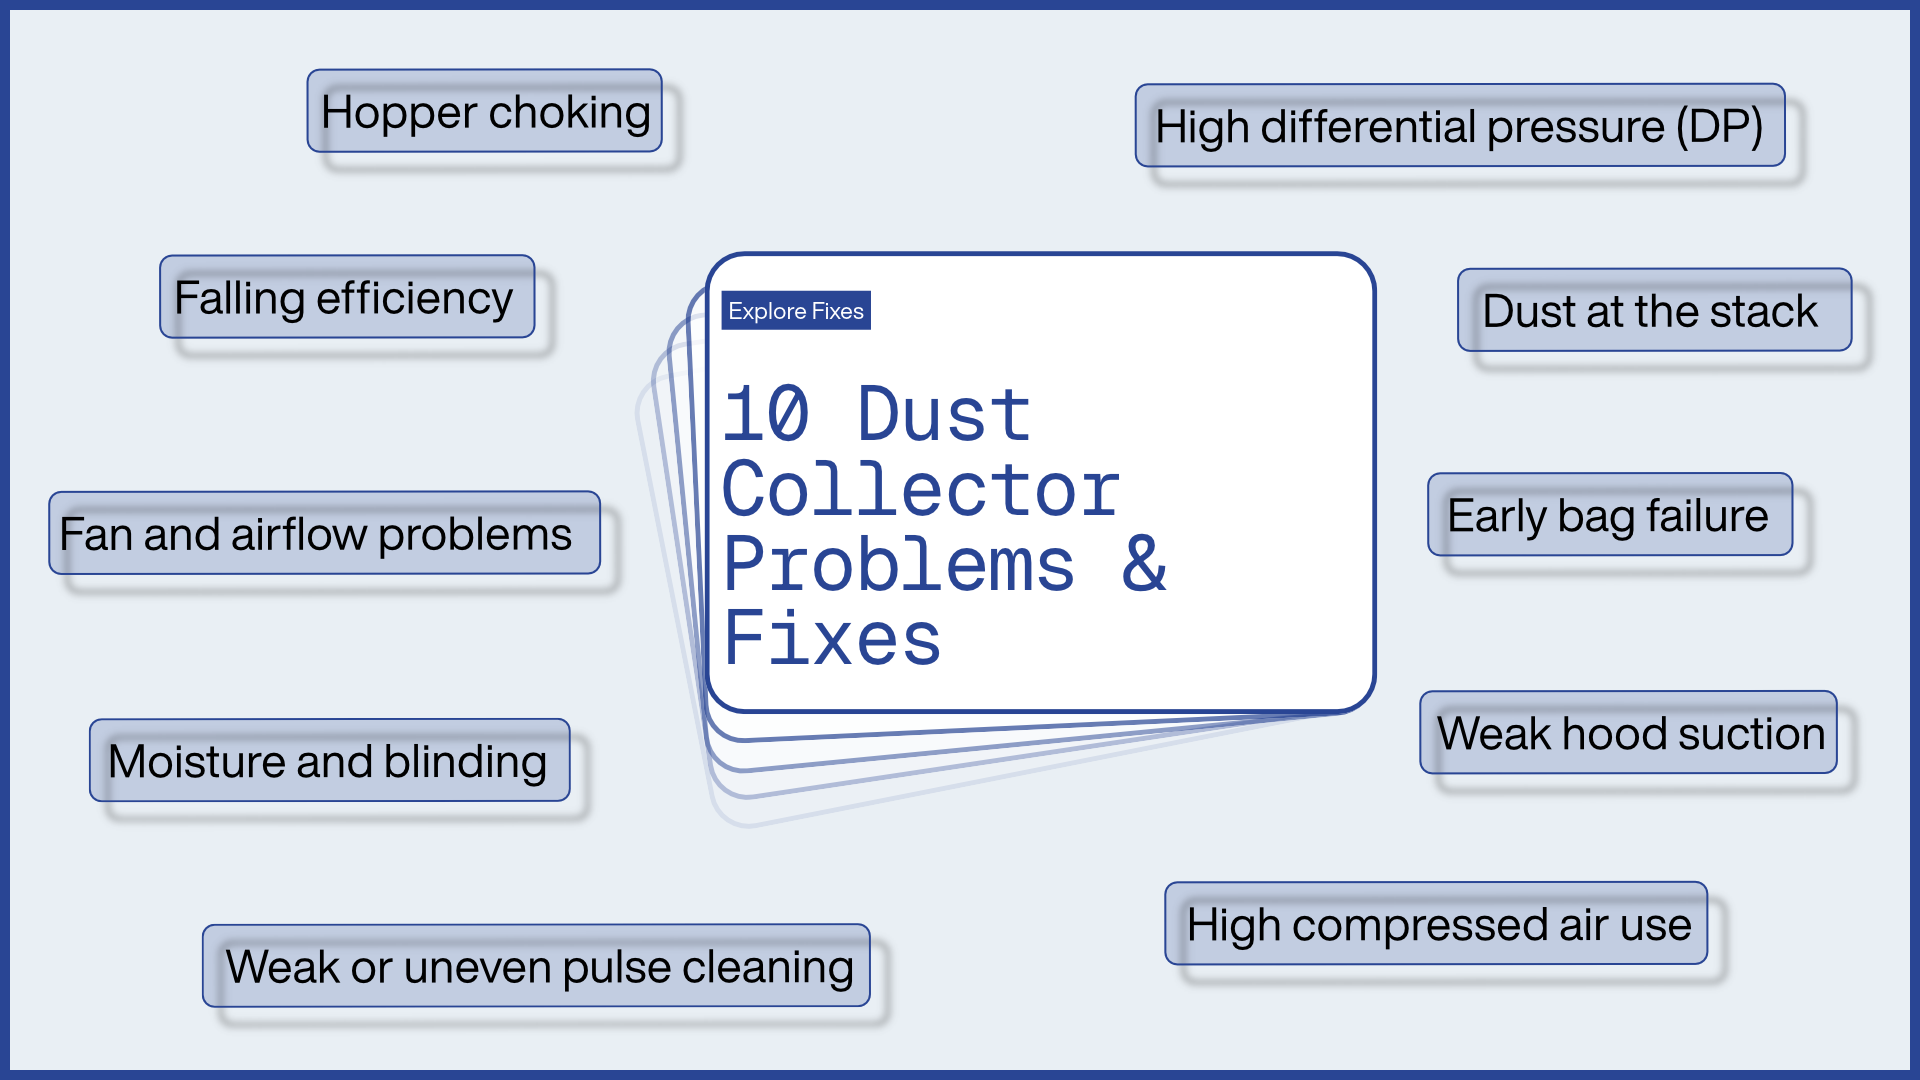
1. High differential pressure
DP climbs above its normal band, cleaning cycles run back to back, and hood suction weakens. The usual causes include blinded or worn media, weak cleaning, airflow above design after new branches, finer or heavier dust after a process change, or a plugged DP sensing line.
How to fix it:
- Check the installed gauge against a handheld manometer before acting.
- Watch residual DP just after cleaning. If it keeps rising, the media is losing permeability. If only peak DP rises, dust load or the cleaning interval has changed.
- Fix the cleaning system before you replace bags (see Problem 8).
- If airflow is above design, restore damper settings and ask the OEM to check the gas-to-cloth ratio.
- For heavy, coarse dust, a cyclone pre-separator takes load off the bags.
2. Dust coming out of the stack
Dust at the stack means gas is getting around the media through a torn, burnt, or detached bag, an unseated snap band, a cracked tubesheet, or an open bypass damper. A small puff right after each pulse is normal, because cleaning removes part of the dust cake (EPA bag leak detection guidance). A puff that grows week by week, or appears every time one row fires, is a leak.
How to fix it:
- Match opacity or leak detector spikes to the pulse sequence to find the row.
- Inspect the clean-air plenum for dust rings at the bag openings.
- Use a fluorescent dye test for leaks you cannot see.
- Replace failed bags, then find out why they failed (Problem 3).
In cold or humid weather, rule out steam first. A water vapour plume detaches from the stack and fades quickly, while opacity readings stay normal.
3. Filter bags failing early
EPA's bag leak detection best practices list poor installation, spark holes, abrasion, thermal excursions, and chemical attack as the main causes of bag failure. The failed bags tell you which one you are dealing with, so mark each failure's position on a tubesheet map before you throw them away.
| Damage pattern | Likely cause |
|---|---|
| Holes low on bags nearest the inlet | Inlet abrasion or high upward gas velocity |
| Wear lines matching the cage wires | Loose fit, or rough and corroded cages |
| Holes just below the cuff | Misaligned blowpipe hitting the bag |
| Small holes with charred edges | Sparks or hot particles |
| Brittle, shrunken or glazed fabric | Gas temperature above the media limit |
| Weak, discoloured fabric near walls or hopper | Acid or moisture condensation at cold spots |
How to fix it: correct the cause before rebagging. Repair inlet baffles, replace damaged cages, realign blowpipes, and set an alarm on high inlet temperature. If the cause is unclear, send a bag to a filter media lab for strength and permeability tests. TECHFLOW's filter bag media selection guide covers matching fibre to temperature and chemistry.
4. Weak suction at the hoods
First check whether one hood or every hood is weak. One weak hood points to its own branch. Weak suction everywhere points to the fan or to high filter DP. The OSHA Technical Manual names plugged or dented ducts, slipping belts, holes in ducts, worn fan blades, and a clogged air cleaner as the usual causes of lost airflow.
How to fix it:
- Compare hood static pressure at each hood with its commissioning value.
- Check every damper and blast gate against its recorded position.
- Tap horizontal duct runs. A heavy thud with no sheet metal vibration suggests settled dust.
- Patch holes, close cleanout doors, and replace worn elbows.
- Rebalance after adding any branch. Opening every damper fully usually starves the hoods that need suction most.
5. High compressed air consumption
On pulse-jet units, leaks, diaphragm valves that fail to close, and over-cleaning all push air use up and weaken cleaning at the same time. For costing, EPA estimates about 2 scfm of compressed air per 1,000 cfm of gas filtered, which gives you a rough benchmark.
How to fix it:
- Stop the sequencer, isolate the header, and watch its pressure. If it falls, air is escaping through leaks or valves that are not sealing.
- Listen at each blowpipe between pulses for a continuous hiss.
- Survey the supply line, fittings, and drains with an ultrasonic leak detector.
- Move from fixed-timer cleaning to DP-based cleaning where the controller allows it.
The Compressed Air Challenge puts leakage under 10% in a well-maintained system and at 20 to 30% of compressor output in a poorly maintained one.
6. Hopper choking and discharge problems
When the hopper fills faster than it empties, dust packs around the bag bottoms, DP climbs, and the bottoms wear through. The common causes are a stopped airlock or conveyor, bridging of damp or sticky dust, and outside air leaking up through a worn rotary airlock.
How to fix it:
- Confirm dust is actually leaving. An airlock can keep turning with empty pockets under a bridged hopper.
- Test the level probe itself, not just its display.
- Check airlock tip clearance. TECHFLOW's rotary airlock valve guide explains why leakage rises as clearance widens.
- Insulate or heat cold hopper walls where condensation forms.
- Never rod or enter a bridged hopper without isolation. A bridge can collapse without warning.
7. Falling filtration efficiency
Outlet dust that creeps up slowly, with no sudden step, usually means the dust cake is too thin, or the media is worn. According to EPA, a fabric filter's ability to catch fine particles comes from the accumulated dust cake rather than the fabric itself. Over-cleaning, a gas-to-cloth ratio above design, and finer dust after a process change all reduce it.
How to fix it:
- Cut cleaning back to what DP actually requires.
- Recalculate the gas-to-cloth ratio at today's measured airflow.
- Get a particle size analysis if raw materials or fuel have changed.
- Replace worn media, and move to membrane media only when lab data supports it.
- Track outlet concentration between stack tests and keep your emission norms in view.
8. Weak or uneven pulse-jet cleaning
Thick cake on some rows and clean bags on others, one compartment running at higher DP, or a valve that stays silent during the sequence all point to the cleaning system. EPA's NACT 282 baghouse course lists the usual causes: low or contaminated compressed air, leaking or frozen diaphragm valves, misaligned blowpipes, timer or sensor faults, and cleaning too often.
How to fix it:
- Watch a full sequence. Every valve should fire once with a sharp report.
- Read header pressure before, during, and after a pulse. It should recover before the next valve fires.
- Open the header drain. Any water or oil there is reaching your bags.
- Rebuild failed diaphragms and solenoids, and centre every nozzle over its bag.
- Set pulse pressure and duration to OEM values. EPA cites typical pulse pressures of 60 to 100 psig (4.1 to 6.9 bar g).
TECHFLOW's pulse jet bag filter guide explains when offline cleaning suits heavy or sticky dust better.
9. Fan and airflow problems
If airflow falls at every hood and DP falls with it, look at the fan. Small speed losses matter. Under the fan laws in the US DOE fan system sourcebook, a 10% drop in speed cuts airflow by about 10% and fan pressure by about 19%. Belt slip, wheel build-up, worn bearings, and reverse rotation are the usual culprits. OSHA notes that a centrifugal fan running backwards delivers only 30% to 50% of its rated flow.
How to fix it:
- Measure fan speed and confirm rotation against the arrow on the housing.
- Compare motor current with baseline at normal damper settings.
- Trend vibration and bearing temperature.
- Clean and rebalance the wheel. Dust on a clean-side fan suggests dust is getting past the filters.
TECHFLOW's centrifugal fan maintenance checklist covers fan checks in more detail.
10. Moisture and filter blinding
Moisture blinding can raise DP within hours. Bags come out heavy, with a mud-like layer that pulsing will not shift. EPA warns that liquid droplets usually plug fabric pores within minutes or hours, so gas must stay above the dew point of every condensable, acid gases included. Trouble usually starts at start-up, shutdown, or low load, at uninsulated hoppers and doors, or with wet pulse air.
How to fix it:
- Compare inlet and outlet gas temperatures with the dew point. A big drop between them suggests air inleakage.
- Check which side of the bag is blinded. The dirty side points to condensation; the clean side points to wet or oily pulse air.
- Insulate cold spots, fix air dryers and drains, and preheat before introducing moist gas.
- Replace blinded bags, because cleaning rarely recovers them.
Dust Collector Troubleshooting Checklist For Plant Inspections
The checklist runs from outside to inside. External readings come first because they need no shutdown and often locate the fault before anyone opens a door. Adapt it to your collector type and the OEM's manual.
Before you start
- Review DP, airflow, temperature, and emission trends for the last 30 days
- Note recent changes: production rate, raw materials, new branches, maintenance work
- Confirm permits for any entry: lockout and tagout, confined space, hot work, and combustible dust precautions
External readings, collector running
- DP across the filters, checked against a handheld manometer
- Residual DP just after cleaning and peak DP just before, or cleaning frequency on clean-on-demand units
- Fan speed, rotation direction and motor current
- Hood static pressure at each critical hood, compared with baseline
- Damper and blast gate positions, compared with recorded settings
- Inlet and outlet gas temperature, compared with the dew point
- Stack opacity, bag leak detector trend or visible emissions
Cleaning system (pulse-jet units)
- Header pressure before, during and after a pulse
- Every valve fires once per cycle with a sharp report
- No continuous hiss at any blowpipe between pulses
- Header drain free of water and oil; dryer and automatic drains working
- Controller interval, pulse duration, and DP setpoints match OEM values
Hopper and discharge
- Level indicator tested, not just read
- Airlock or screw turning, with dust actually leaving the outlet
- No air rushing in at the airlock or inspection doors
- No cold spots or packed dust on hopper walls
Ducts and hoods
- Visual and smoke check at weak hoods
- Tap test on horizontal runs for settled dust
- Holes, worn elbows and open cleanout doors on the suction side
Fan
- Vibration and bearing temperature, compared with trend
- Belt tension, wear and sheave alignment
Internal inspection (shutdown and permit required)
- Clean-air plenum: dust trails at bag openings, tubesheet cracks, snap-band seating
- Blowpipe fixings and nozzle alignment over each bag
- Dirty side: cake condition after cleaning, inlet baffle wear, bag-to-bag contact
- Sample of cages: corrosion, bending, missing wires
- Hopper interior: build-up, bridging, corrosion
- Failed bag positions recorded on the tubesheet map, with samples kept for lab testing
Close-out
- Root cause recorded with the evidence that confirmed it
- Baseline readings retaken after the fix
- Dye test after rebagging, where practical
Preventive Maintenance Schedule For Pulse Jet And Baghouse Dust Collectors
Use these frequencies as a starting point and adjust them to your plant. Tasks marked † match the minimum frequencies in a US baghouse rule for ferroalloy plants (40 CFR 63.1657), which makes a useful regulatory reference point. Your OEM manual, consent conditions, and failure history should set the final intervals.
| Frequency | Task | Why it matters |
|---|---|---|
| Every shift or daily | Record DP across each cell or compartment | Early warning of blinding, cleaning faults and leaks |
| Every shift or daily | Check compressed air header pressure on pulse-jet units | Low pressure means weak cleaning |
| Every shift or daily | Drain the header and confirm automatic drains work | Keeps water and oil off the bags |
| Every shift or daily | Check stack opacity or the bag leak detector trend | Catches failed bags before they multiply |
| Every shift or daily | Record fan current and inlet and outlet gas temperature | Separates airflow and moisture problems from filter problems |
| Weekly | Confirm dust is being removed from hoppers | Prevents re-entrainment and bag abrasion |
| Weekly | Read hood static pressure at critical hoods | Catches duct plugging and imbalance early |
| Monthly | Check bag cleaning mechanisms for proper function | Finds silent valves and controller faults |
| Monthly | Walk the ducts for holes, worn elbows, and open doors | Duct leaks rob hood suction |
| Monthly | Check fan belts, vibration and bearing temperature | Belt slip cuts airflow; vibration trends warn of failure |
| Quarterly | Inspect the housing interior for air leaks and structural condition | Inleakage cools gas and disturbs flow |
| Quarterly | Check bag tension on reverse air and shaker units | Slack or kinked bags fail early |
| Quarterly | Ultrasonic leak survey of the compressed air supply | Leaks waste air and weaken cleaning |
| Every six months | Inspect fans for wear, build-up and corrosion † | Prevents imbalance and loss of performance |
| At planned shutdowns | Valve-by-valve diaphragm and solenoid audit | Restores even cleaning across all rows |
| At planned shutdowns | Check blowpipe alignment and fixings | Prevents damage at the bag tops |
| At planned shutdowns | Measure rotary airlock tip clearance | Limits inleakage at the hopper |
| At every rebagging | Inspect cages, confirm bag-to-cage fit and snap-band seating, record bag positions | Poor fit and seating cause avoidable early failures |
| At every rebagging | Dye test after installation, where practical | Confirms a leak-free tubesheet before restart |
| Whenever the process changes | Review airflow, gas-to-cloth ratio, media and moisture risk | An unreviewed change can push the collector outside its design envelope |
Safety First: Combustible Dust, Confined Spaces And When To Call The OEM
Troubleshooting puts people close to stored energy, hot surfaces, and dust that may be combustible or toxic. Every job plan should cover the following.
- Combustible dust. OSHA warns that any combustible material can burn rapidly when finely divided. NFPA 660, the 2025 Standard for Combustible Dusts and Particulate Solids, consolidates the earlier NFPA 652, 654, 61, 484, 655 and 664 standards and requires a dust hazard analysis. Never bypass explosion vents, isolation valves, or spark detection to keep a collector running, and control hot work and ignition sources during repairs.
- Confined spaces. Housings, plenums and hoppers are confined spaces. Use the site permit system, test the atmosphere, and isolate every energy source before entry.
- Stored compressed air. A pressurised header can fire a valve after the controller is switched off. Isolate and bleed the header before working on blowpipes or valves.
- Bridged hoppers. A bridge or rathole can collapse without warning. Never work beneath hung-up material.
- Hot gas and hot surfaces. Allow time to cool down and check surface temperatures, especially on boiler and furnace duties.
When to involve the OEM
- Failures keep coming back after the obvious causes have been fixed.
- Airflow, gas temperature, dust type, fuel, or raw material has changed.
- You plan to change media, add filter area, raise fan speed, or change cleaning settings beyond the manual.
- Explosion protection, isolation, or spark detection needs modification.
- Emissions are approaching consent or permit limits.
Where To Start On Your Own Collector
Most faults in this guide show up in DP, airflow, header pressure, or gas temperature weeks before they turn into a torn bag or a dusty stack. The most useful job this week is to check that those four readings are logged against a commissioning baseline. If no baseline exists, record one after the next rebagging or major repair, once the system is running to design.
When something does go wrong, confirm the cause with a second reading before you replace parts. A high DP reading, a weak hood, or a failed bag shows where the problem surfaced, and the fault itself may sit somewhere else in the system.
How TECHFLOW can help
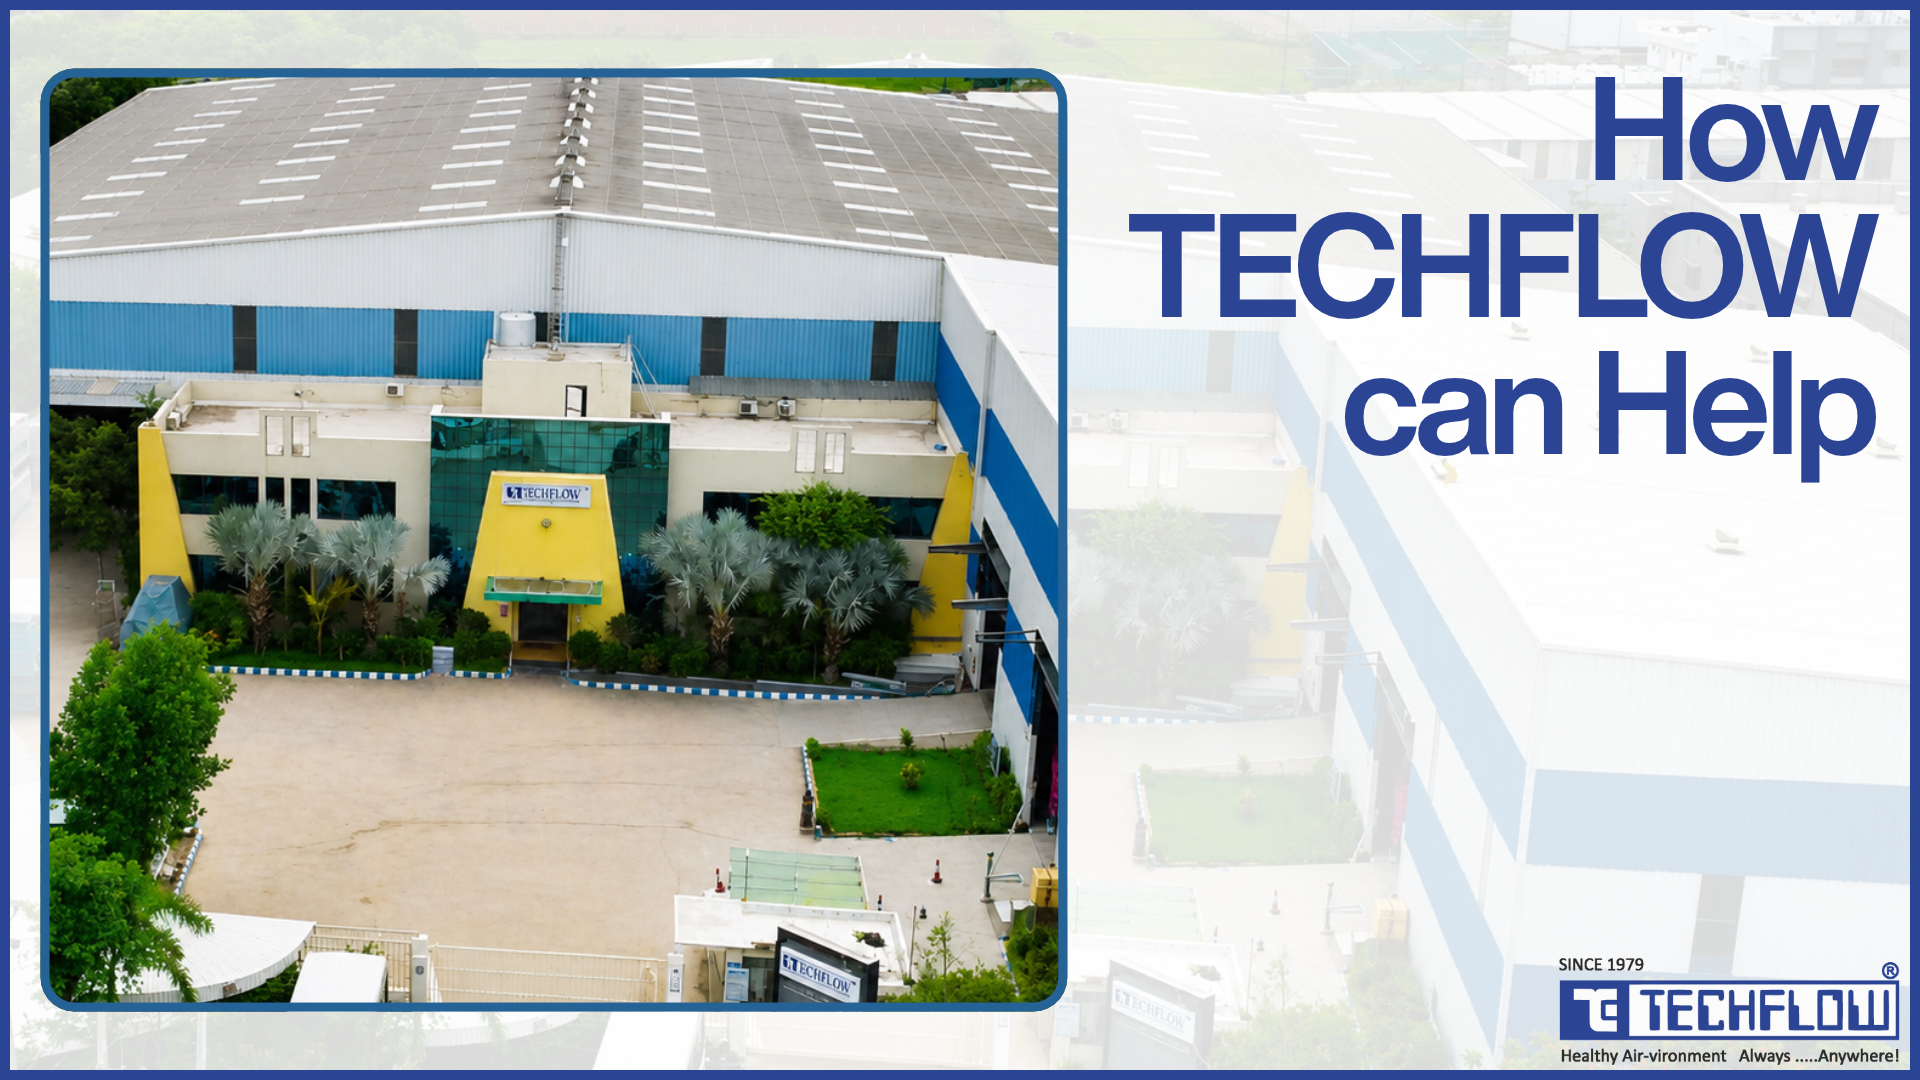
We have designed and manufactured air pollution control equipment at our works in Ahmedabad since 1979. We have supplied more than 3,500 dust collection and air pollution control systems, 7,500 fans and blowers, and 500 conveying systems to customers in 58 markets, across steel, cement, power, foundry, food processing, pharmaceutical, and other industries. Because we build the collector, the discharge equipment, and the fan, we can trace a fault across the whole system.
Here is how we can help with a dust collector problem:
- Root-cause review. Send us your DP and airflow trends, gas temperatures, and photos of failed bags marked with their tube sheet positions. Our engineers will help you confirm the cause before you spend on parts.
- Site visits and breakdown support. Our after-sales team is on call Monday to Saturday, 9 am to 6 pm, and we arrange emergency breakdown support by phone or on site (FAQs).
- Retrofits and upgrades. We customise systems to the pollutant, gas volume, temperature, and emission limit, and we can modify an existing layout without hampering its performance or production capacity.
- Equipment we manufacture: pulse jet bag filters, pulse jet cartridge filters, reverse air cassette filters, cyclone dust collectors, Roto Tuff rotary airlock valves and centrifugal fans.
- Compliance. We design systems to meet CPCB norms and project-specific limits, such as 5 mg/Nm³ where a project requires it.
- Installation, commissioning and training. Our erection team installs and commissions systems across India and abroad, and we train your operators and maintenance staff. Every product comes with an operation and maintenance guide.
Contact us or email sales@techflow.net.
Frequently Asked Questions (FAQs)
There is no single normal value, because DP depends on the media, dust, gas-to-cloth ratio, and cleaning method. For costing, EPA's cost manual uses a design maximum of about 5 to 10 in. H2O (127 to 254 mm WC) across the baghouse. Your OEM's range and your post-commissioning baseline define normal for your unit.
Low DP with visible emissions usually means gas is bypassing the media through torn or detached bags, an unseated snap band, a cracked tubesheet, or an open bypass damper. Inspect the clean-air plenum for dust trails at the bag openings, and use a fluorescent dye test if the leak is hard to find.
A small, brief spike right after cleaning is expected, because each pulse removes part of the dust cake that does the fine filtering. A spike that grows over weeks, or one that appears only when a particular row fires, usually means damaged bags or poor seals in that row.
Bottom wear usually comes from inlet gas striking the bags, high upward velocity under the bags, bags rubbing each other, or a hopper that has filled up to the bag bottoms. Map which rows fail and how high on the bag, then check the inlet baffle, hopper level, and bag-to-cage length.
Replace bags on condition. A set is near the end of its life when residual DP no longer recovers after cleaning, emissions rise, failures multiply, or lab tests show lost strength or permeability. Published figures, such as the 2 to 4 years EPA uses for costing, are planning assumptions.
Use the OEM's setting. EPA cites typical pulse pressures of about 60 to 100 psig (4.1 to 6.9 bar g), but designs differ. The air must also be dry and oil-free, because wet or oily pulse air blinds bags from the clean side.
A failed diaphragm valve either stays silent when its turn comes in the sequence or hisses continuously into its blowpipe between pulses. Check the controller output and solenoid pilot first, then strip the valve and inspect the diaphragm, spring, and seat.
Not when the cause is blinding, moisture, or excess airflow. Over-cleaning wastes compressed air, flexes the media, and strips the dust cake that does the fine filtering, which can raise emissions. Find the cause first, then change cleaning settings only if the evidence supports it.
Start by checking whether one hood or every hood is weak. One weak hood points to its own branch: a plugged duct, a leak, or a closed damper. Weak suction at every hood points to high filter DP or a fan problem such as belt slip, low speed, or reverse rotation.
Match bag leak detector or opacity spikes to the pulse sequence to identify the row being cleaned. Then inspect the clean-air plenum for dust rings at the bag openings in that row. A fluorescent dye test, viewed under UV light, finds smaller leaks that a visual check misses.
EPA's NACT 282 baghouse course names moisture in the dust cake, lubricating oil from pulse-jet air, and submicron particles as causes of blinding. Moisture usually comes from gas cooling below its dew point, often during start-up or shutdown, or from wet compressed air.


